How to make an AI influencer character sheet, one angle at a time
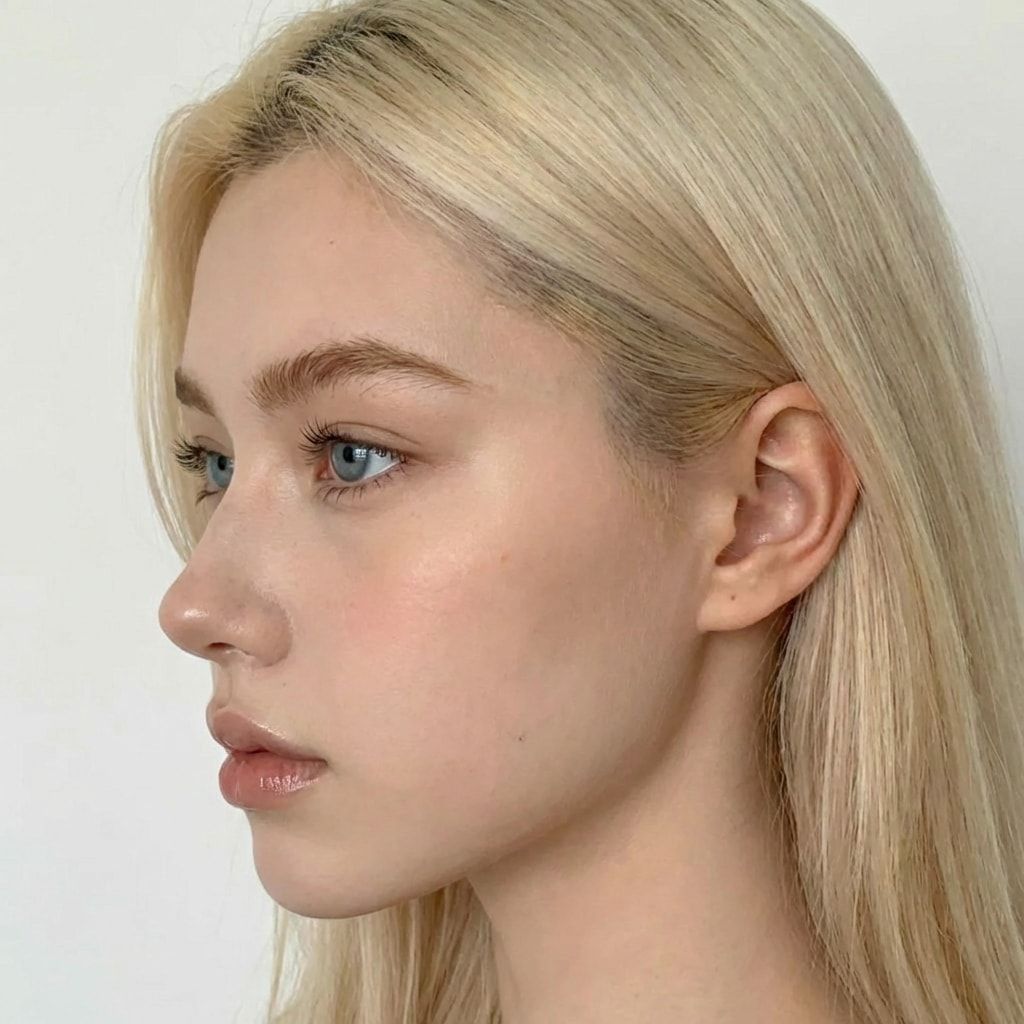
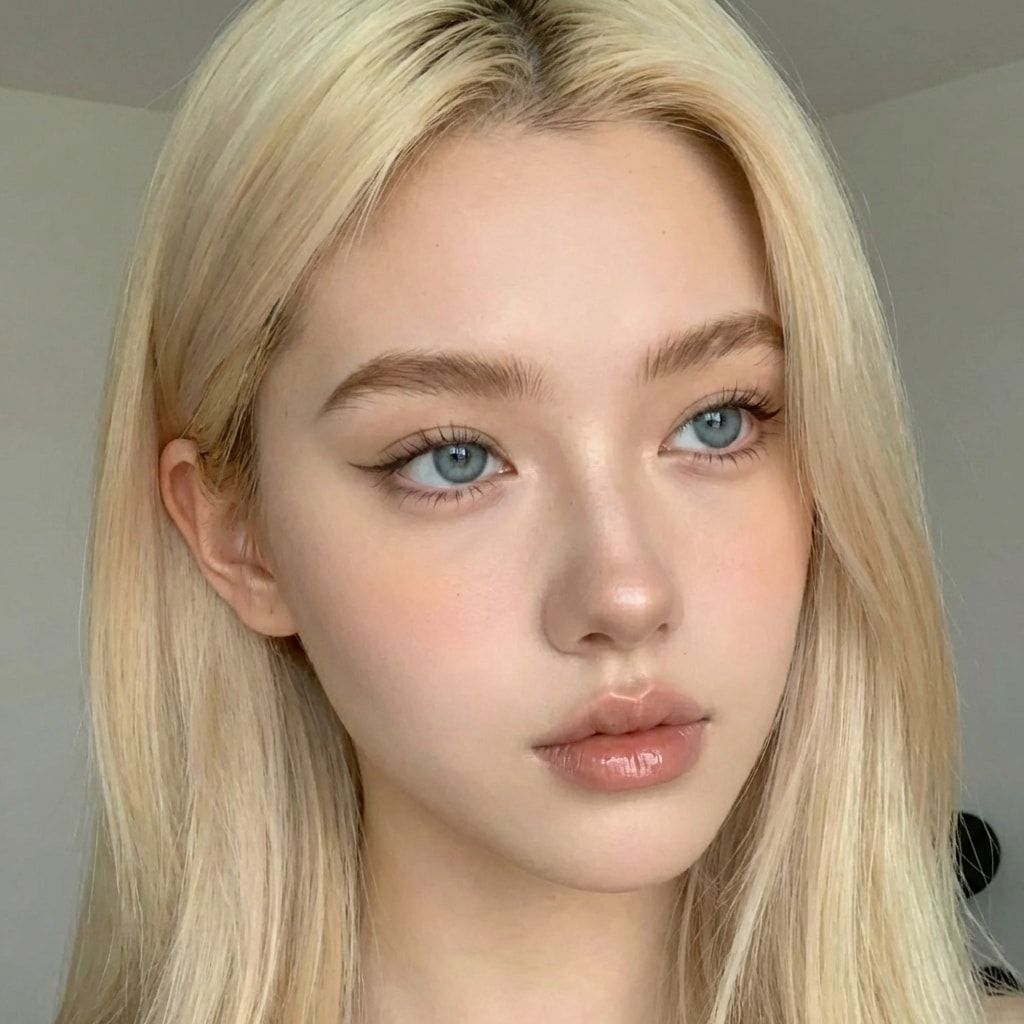
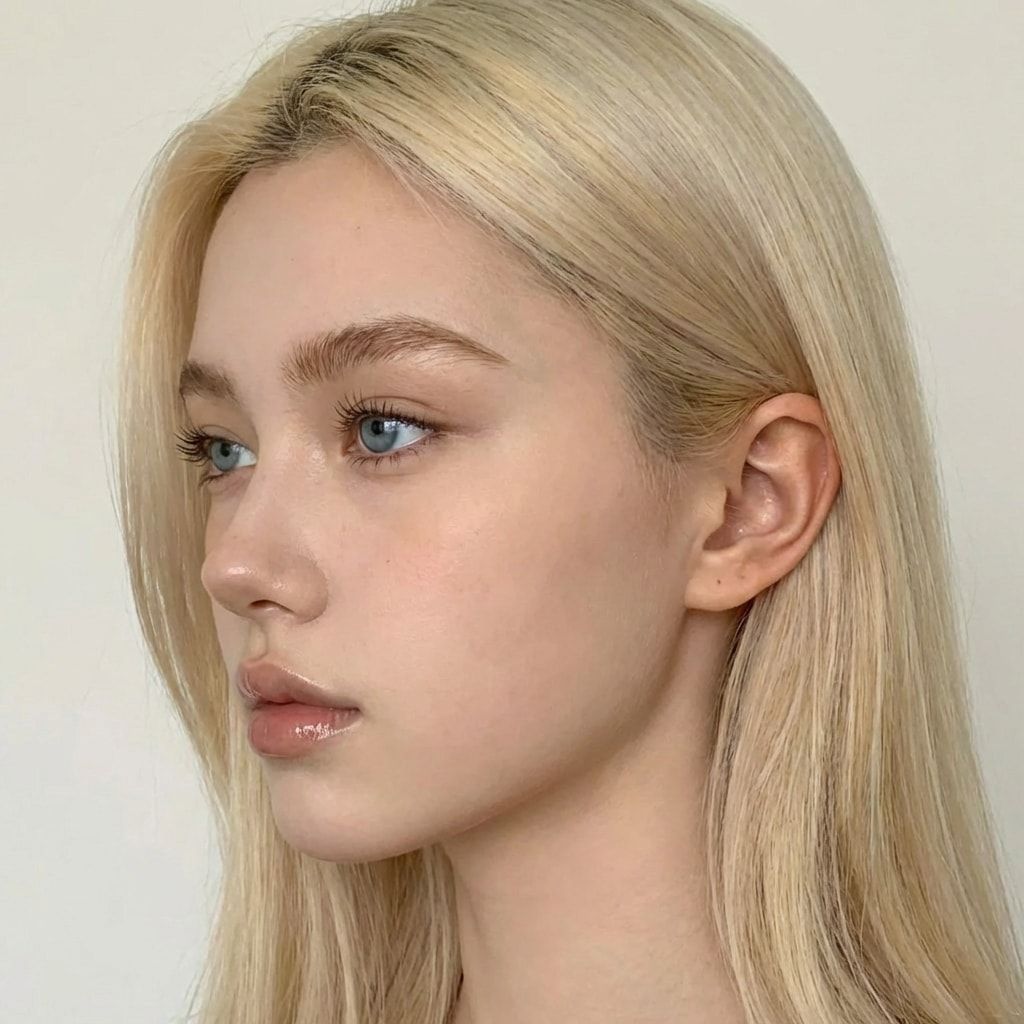
An AI influencer character sheet is one face shown from 7 angles: the front shot you picked, plus six turns made with an edit model, one prompt per image. The course’s six angle prompts are below. It’s the first thing to make once you have her face, and the base of a consistent AI character.
What is an AI influencer character sheet for?
It’s her reference file. The sheet shows the same face from the front, turned left and right, looking up and down, and in both profiles. You check new images against it, you turn the front shot into a dataset, and you hand the front and profile shots to video and UGC tools as references.
Three jobs in our pipeline:
- Her dataset. The AI Empire Dataset Maker takes one clear front-facing photo and turns it into a 50-image dataset for her character LoRA.
- AI UGC references. The course’s UGC lesson starts from her front, two profiles and one outfit shot, plus the product images. See how to make AI UGC videos.
- Checking her. When you test a LoRA, you compare its images to the sheet. If the profile doesn’t match her profile, you see it straight away.
Why make one angle per image instead of a grid?
Because you use the shots one at a time. A grid squeezes six views into one picture, so each face is small and boxed in next to the others. Separate images stay full size, you can redo one bad angle without redoing the rest, and each one works as a reference on its own.
Google’s Gemini image docs describe the same approach for a 360° view of a character: prompt for each angle in turn, and include the earlier images in later prompts (checked 2 Oct 2026).
| One grid image | One angle per image | |
|---|---|---|
| Size of each face | Small, a fraction of the frame | Full frame |
| Fixing one bad angle | Redo the whole grid | Redo that one shot |
| Use as a reference or in a dataset | Has to be cropped first | Ready as it is |
What are the six angle prompts?
Six short sentences from the course, one per edit. Each one names a direction and nothing else, so the model has one thing to change: where her head points. Paste them one at a time, with her front shot as the input image, and check every result before you run the next.
1. subject must be looking slightly to the left with her head slightly tilted to the left
2. subject must be looking slightly to the right with her head slightly tilted to the right
3. subject must be looking down with her head tilted down
4. subject must be looking up with her head tilted up
5. subject must be showing her left side profile
6. subject must be showing her right side profile
Short on purpose. Don’t add her outfit, the place or the light here: every extra instruction is something else the model can change, and the face changes with it.
How do you make the sheet, step by step?
Pick her front shot, write down her identity lines, then run the six prompts through an edit model one by one, checking each result before the next. Keep her expression neutral in the front shot: that’s the face every other angle is built from.
- Choose the front shot. Clear, front-facing, even light, nothing covering her face. Make it in the free Discord face generator, 10 a day, or on your own GPU with our Z-Image Turbo settings. It’s the same photo the Dataset Maker needs later.
- Write down her identity lines. Her trigger word, like
zvx woman, and her hair-and-eyes line in the course format: length, texture, colour, one style detail, eye colour. Example:long wavy dark brown hair, middle part, hazel eyes. - Open an edit model that takes a reference image. The course runs these prompts in Nano Banana Pro; Qwen-Image-Edit also takes a reference image. Upload the front shot.
- Paste prompt 1 and generate.
- Check it. Same face, same hair, same eye colour, only the angle changed. If not, generate again. Don’t keep a near miss.
- Repeat for prompts 2 to 6. Upload the front shot each time. If the model struggles with an angle, add one approved angle as a second image.
- Add expressions if you want them. A smiling shot and an eyes-to-the-side shot help when you check a LoRA later.
- Save the set in one folder named after her trigger word, with a text file holding her identity lines.
What goes in the written half of the sheet?
The words you reuse in every prompt and caption: her trigger word, her hair-and-eyes line, her body type and the facts that never change. Keep it short. Face shape, makeup, skin and body details stay out of prompts. The images and her LoRA carry those, and describing them pulls the model toward a different woman.
| Field | Example | Where it’s used |
|---|---|---|
| Trigger word | zvx woman |
Every prompt, every caption, the LoRA trainer |
| Hair and eyes | long wavy dark brown hair, middle part, hazel eyes |
Every prompt, and the Dataset Maker’s hair_and_eyes box. Never in training captions. |
| Body type | One of the Dataset Maker’s six presets, such as athletic or petite | The Dataset Maker’s body_type box |
| Disclosure | “AI-generated” in bios, the platform’s AI label on | Instagram, TikTok, Fanvue |
Everything around her look (places, outfits, voice, what she never says) goes on her AI influencer persona sheet.
Captions for training follow a different rule from prompts: trigger word, shot and pose, outfit, place, light, framing last, and never her face or hair. That way the LoRA ties her face and hair to the trigger word. More in how many images a LoRA needs and how to caption them.
What do you do with the sheet next?
Turn the front shot into a dataset and train her LoRA. The sheet alone holds her face for a few posts; a LoRA trained on about 50 images of her holds it for hundreds. The front and both profiles also become her references for AI UGC and for rebuilding video frames with her in them.
The six angles cover only part of a dataset. To plan the other dataset shots and their captions, use the LoRA dataset planner.
If you keep editing her with Nano Banana in the meantime, read why Nano Banana keeps changing her face first. The numbered-reference method there works for the angle shots too.
What can go wrong?
- The model ignores the angle and gives you another front shot. Use the course’s “How To Prompt” trick: upload the front shot to ChatGPT, describe the angle you want in plain words, and ask it to write the prompt for your edit model. Then paste that prompt instead.
- Her face changes in the profiles. Generate again until it’s clearly her. One wrong profile in a dataset teaches the LoRA a second face.
- Her hair colour or length shifts. Regenerate, or add her hair-and-eyes line after the angle prompt.
- Her expression or makeup changes between shots. Start from a neutral front shot and keep the angle prompts short. Every extra word is an extra change.
- The model refuses the image. Keep the input SFW and the prompt plain. In the Dataset Maker, refused photos are skipped and retried once at the end of the run.
- You started from a real photo. Stop and start over from a generated face. Original characters only.
Questions people ask
Can I make a character sheet in one image?
Which tool makes the angle shots?
Is a character sheet enough to keep her face consistent?
Can I build a character sheet from a real person's photo?
Read next
- How to keep your AI character's face the same in every photo
Prompts, reference images, a character LoRA, or a LoRA trained on a dataset you generate. What each holds, what it costs, and when you need a LoRA.
- How many images do you need to train a character LoRA?
A character LoRA needs 20 to 50 images. We train on 50. What they should show, how to caption them, how to pick a trigger word, and what goes wrong.
- Nano Banana keeps changing her face: what actually fixes it
Why Nano Banana changes your AI character's face, the numbered-reference prompt method we use, how to change her pose, and when a LoRA is the fix.
- How to create an AI influencer in 2026, step by step
One original face, a 50-image dataset, a character LoRA you own, the AI label on, then growth and Fanvue. Real steps, settings and GPU costs.