How to upload and download files on RunPod
To download files from a RunPod pod, open JupyterLab on port 8888, find the file in the file browser, right-click it and choose Download. On our templates 3 places matter: output/datasets/ for the Dataset Maker zip, AI Toolkit’s New Dataset screen on port 8675 for her training photos, and output/<job>/ for finished LoRAs. Do it before you terminate the pod; our RunPod for AI images guide explains why.
Where are your files on the pod?
Each of our templates keeps its work on the pod’s volume disk at /workspace, so a stop and start doesn’t lose it. The table lists where every file you’ll upload or download actually lives and which port to open for it. Paths match the templates’ READMEs as of October 2026.
| Template | File | Where it lives | Open |
|---|---|---|---|
| Dataset Maker | Your face photo (in) | Uploaded in the Your face box in ComfyUI | Port 8188 |
| Dataset Maker | Finished dataset (out) | output/datasets/<name>.zip in ComfyUI’s folder |
Port 8888 |
| LoRA trainer | Her dataset (in) | AI Toolkit’s New Dataset screen, from the unzipped folder. Or the zip in datasets/ inside /workspace/aitk; it unzips itself |
Port 8675 (or 8888 for the zip) |
| LoRA trainer | Checkpoints and final LoRA (out) | The job page in AI Toolkit (Queue → View all); on disk, output/<job>/ inside /workspace/aitk |
Port 8675, or 8888 |
| LoRA trainer | Helper log | /workspace/aitk/aiempire.log |
Port 8888 |
AI Toolkit saves a checkpoint every 250 steps, named like <job>_000002500.safetensors, plus the final <job>.safetensors. The course’s 3000-step job sets Max Step Saves to Keep to 12 (AI Toolkit’s default keeps 4). You don’t need them all on your computer: video 3 downloads three, the final file, 2500 and 2000, and compares them. How is in how to test a LoRA.
How do you download files with JupyterLab?
Connect to port 8888, browse to the file, right-click, Download. JupyterLab’s own docs say any file can be downloaded that way. Folders are the catch: download works on files. So for a folder of outputs, make a zip in the terminal first, then download that one file.
- Open JupyterLab. On the Pods page, click Connect, then the HTTP link for port 8888. The address looks like
https://<pod-id>-8888.proxy.runpod.net. - Log in. Use the
JUPYTER_PASSWORDyou set when you deployed. If you get a “Token authentication is enabled” screen instead, open the web terminal, runjupyter server listand paste the part aftertoken=(RunPod docs). - Browse to the file in the left file browser, using the table above.
- Right-click it and choose Download. Your browser saves it like any other download.
- For a folder, zip it first. Open a terminal from the JupyterLab launcher,
cdinto the folder above it, and run:
python3 -m zipfile -c results.zip yourfolder/That uses Python’s built-in zip tool, so you don’t need to install anything. Then download results.zip.
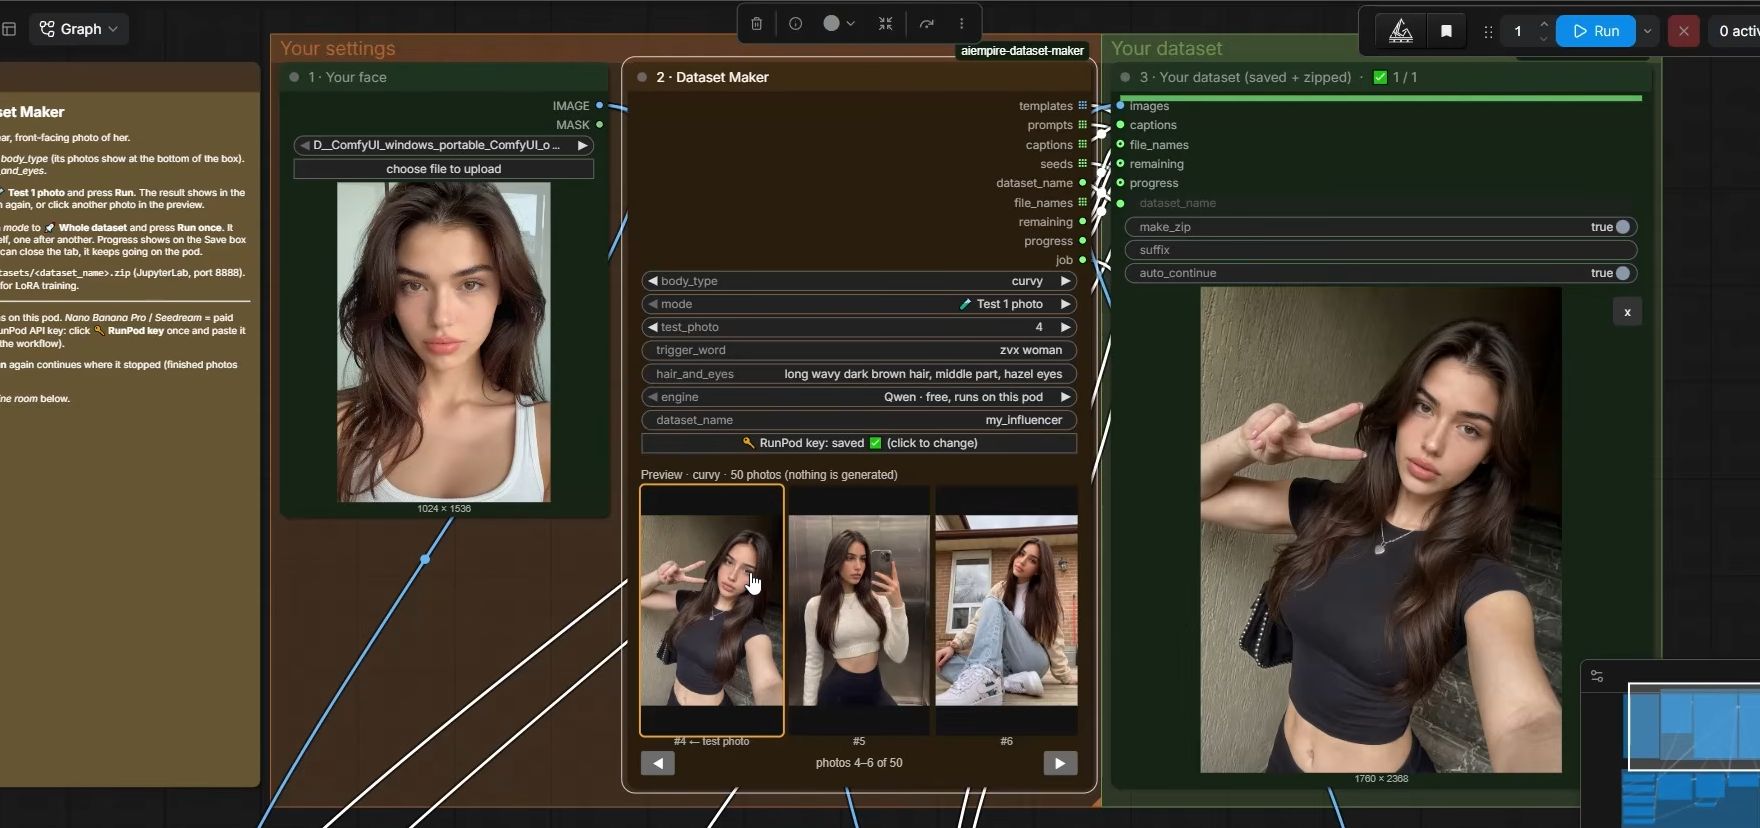
The Dataset Maker does the zipping for you: the whole 50-image set with its caption files is one <name>.zip. Its README also gives a direct link through ComfyUI, which on RunPod looks like https://<pod-id>-8188.proxy.runpod.net/view?filename=<name>.zip&subfolder=datasets&type=output.
How do you upload files to a pod?
Most files go in by dragging them onto JupyterLab’s file browser, or with the Upload Files button at the top of it. They land in whichever folder is open. Her training dataset is the exception: video 3 of our course uploads it in AI Toolkit’s own New Dataset screen, straight from the unzipped folder.
- Unzip the Dataset Maker zip on your computer.
- Open AI Toolkit from the pod’s Connect menu (port 8675).
- Click New Dataset, give it a name and click Create.
- Drag in everything from the unzipped folder: the photos and their
.txtcaptions, in one go. - Look through it. Every photo should be her. Then set up the training job.
The alternative: in JupyterLab, open datasets/ inside /workspace/aitk and drop the zip there. The template unzips it.
A few other uploads have their own way in:
- Your face photo for the Dataset Maker goes in through the Your face box in ComfyUI on port 8188, not JupyterLab.
- Her LoRA files for a generator go into
models/lorasin JupyterLab. Three files are about 1.5 GB, so stay on the tab until the upload finishes, then press R in ComfyUI. - Model files for ComfyUI go into the matching folder under
ComfyUI/models/, then refresh ComfyUI. If a workflow still can’t find them, see ComfyUI missing models.
The checkpoints folder trap. JupyterLab can’t open any folder named exactly checkpoints: clicking it does nothing, because Jupyter treats the name as reserved. ComfyUI has one at models/checkpoints. RunPod’s docs give three ways round it: drop files onto the folder anyway (it accepts them), rename it in the terminal with mv checkpoints checkpoint and back again when you’re done, or copy files in from the terminal with cp.
Is there a faster way for big files?
Yes, but you rarely need it for this work. A 50-image dataset and a LoRA file move fine through JupyterLab. When you’re moving many gigabytes, or syncing the same folder often, RunPod supports four other methods, and two of them need SSH set up first. Pick by file size and how often you transfer.
| Method | Good for | Setup |
|---|---|---|
runpodctl send / receive |
Quick small to medium files, with a one-time code | Preinstalled on pods; install it on your computer |
| SCP | Single files and folders, any size | SSH access to the pod |
| rsync | Large folders, repeat syncs (only sends what changed) | SSH, plus rsync on both ends (Linux or WSL) |
| Cloud Sync | Backups to S3, Google Cloud, Azure, Backblaze or Dropbox | Your cloud account |
Source: RunPod’s transfer files docs, checked 2 Oct 2026.
When do you have to download before it’s too late?
Before you terminate, and before your balance runs out. Terminating deletes everything that isn’t on a network volume. If your RunPod balance hits $0, RunPod terminates pods without a network volume and the data can’t be recovered (RunPod billing docs, checked 2 Oct 2026).
After every session: download the dataset zip or the LoRA files, make sure they open on your computer, then stop and terminate. Why terminate rather than just stop is covered in the stop vs terminate section of our RunPod guide. What happens at $0, and how to get a warning first, is in how RunPod billing works.
What can go wrong?
- The dataset zip has fewer than 50 photos. With a paid engine, RunPod’s API may have refused some photos: the Dataset Maker skips refused photos after one retry at the end. Open the zip and count: images and
.txtcaptions should match. Run Whole dataset again; it skips the photos already done. - You downloaded a folder and got nothing. JupyterLab downloads files. Zip the folder first.
- A stopped pod comes back with 0 GPUs. Your files are still there. Start it with zero GPUs and copy them off through the terminal or Cloud Sync; the JupyterLab button won’t work without a GPU attached (RunPod docs).
- JupyterLab is open to anyone. You skipped
JUPYTER_PASSWORD. Anyone with your pod’s URL can browse and download your files. Set it before you deploy.
Questions people ask
How do I download a whole folder from RunPod?
Where is my LoRA after training on RunPod?
Why can't I open the checkpoints folder in JupyterLab?
Do I need SSH to move files to RunPod?
Read next
- RunPod for AI images: templates, GPUs and what it costs
Rent a GPU by the hour instead of buying one. Which RunPod GPU to pick, what storage costs, how to run ComfyUI, and the stop vs terminate trap.
- How many images do you need to train a character LoRA?
A character LoRA needs 20 to 50 images. We train on 50. What they should show, how to caption them, how to pick a trigger word, and what goes wrong.
- ComfyUI missing models: put each file in the right folder, with the right name
Fix ComfyUI missing models and "Value not in list": the right folder for each file, names that match exactly, and uploading models to a RunPod pod.
- RunPod pod stuck on initializing or not ready: what to check
A RunPod pod that won't start is usually still downloading. Read the logs, wait out first boot, then check ports, GPU count and the CUDA filter.